If your're anything like me then you may not be the most disciplined photographer when it comes to Tagging and Cataloging your images. This is frustrating especially when you've been on holiday or a photography trip and some time after the event you want to know where a particular image was taken. This is where Geo-Tagging comes in. Geo-Tagging is simply a way to add the place where the the picture was taken to the rest of the "Meta Data" that is recorded alongside your photo when you click the shutter. A GPS chip, logs your Longitude and Latitude data (your position), and then when you take the image from your camera, software or Google Maps etc can tell you exactly where your shot was taken.
I've always liked the thought of being able to Geo-Tag my images, but for some reason mainstream camera makers seem reluctant to add this feature as part of the camera and charge a fortune for a specialist accessory. The only choice then is to use an external GPS.
The principle of using an external GPS unit is that you carry it around with you while you are shooting, and it constantly records your position at any given time. Each of your images will have in its Meta Data the time the image is taken. So as long as your GPS clock and your camera clock are synchronised, some clever software can look at the time each image was taken, cross reference that with the GPS data to find out where you were standing at that moment in time, and then add the location co-ordinates to your photo. Brilliant!
I've tried a couple of alternative methods in the past, I've used a program for the Iphone, which worked but sucked the battery dry in a couple of hours, and I've used a Garmin unit which worked, but is relatively big and heavy, you certainly know its in your pocket!
 |
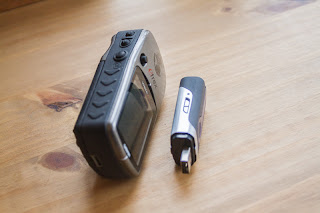
| Garmin Etrex and GPS Datalogger |
I recently stumbled on (for me) a genre of product called a USB GPS data logger, and because it doesn't have to be a phone, or carry tons of maps and a screen etc can be slimmed down to the size of a large USB memory stick, you can see the difference in size in the picture above. There's a big difference in weight too, the Garmin weighs in at 171g whereas the USB one comes in at 33g. So its small and light a slips easily into a pocket. This one has an internal battery, with a reported 18 hour life and charges from a USB port.
 |
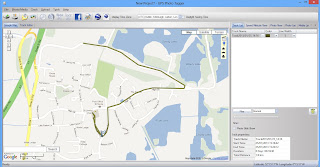
| GPS Photo Tagger main screen |
This unit came with some software called GPS Photo Tagger which downloads the data from the device, allows you to edit the data if you wish will add the location data to your photos, or export the data as a GPX file for importing into other programs (I use Lightroom for this).
 |
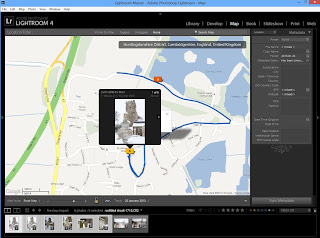
| Lightroom 4 Maps with GPS Track and encoded images. |
Lightroom 4 had a new module called Maps and allows images to be placed on a map where they were taken either manually or by importing a GPX file and letting Lightroom work out where the images were taken. I export a GPX file from Phototagger and import that to Lightroom and let it do its stuff which takes seconds.
It would be good if Lightroom 4 could import data right from the device to take away the intermediary step, but it all works well enough.
 |
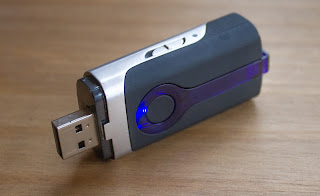
| USB GPS Data Logger |
For info, I got the device from Amazon for less than £30, just search for "USB GPS data logger" and you should get some options.
I should also mention that the data from the GPS unit also records your trip, so distance walked, altitude reached is all in there and should you wish to you can see all of that on a Google map via the Photo Tagger software.
Great Stuff.


No comments:
Post a Comment